Multi-edit
We make it more intuitive to select several documents in the work list in order to perform actions on all the selected documents - what we call multi-edit.
Before

There was no indication that you could select multiple documents in the worklist by selecting a row in the worklist, and using shift / control to add more rows, and the selected rows were only shown with a darker colour. In the screenshot above, two rows are selected.
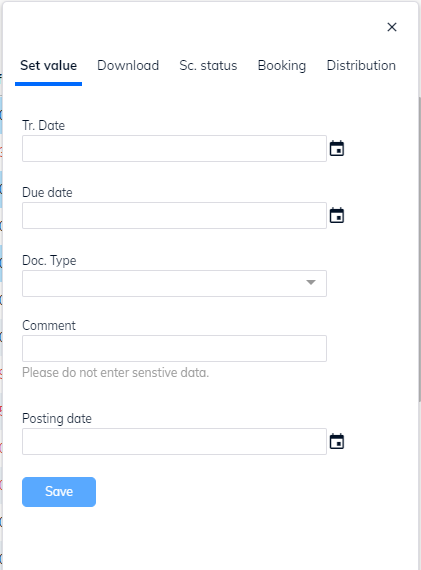
When several documents are selected, the multi-edit menu opens on the right of the screen.

After

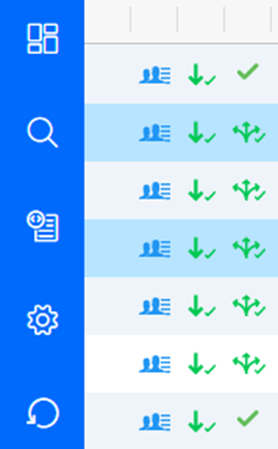
We are now adding a separate check box that makes it easier to select several documents, and see which documents have been selected. You can still use shift / control to select multiple documents, but you can also tick in the checkboxes directly. If you want to select all the documents in the work list, simply tick the box at the top of the column.
When you have selected two or more documents, a new multi-edit menu opens on the right of the screen.

Once you have selected an action, an updated side panel opens where you can perform the action you have selected, and you can navigate between the different action types via the menu bar at the top of the side panel.
Opening the document editor
We are making it easier to understand how you can open the document editor to view the invoice image and work with the invoice.
Before:
There was nothing in the interface that explained that you had to double-click on a row, or press Enter, to open the document editor.
After:

We are adding an edit icon, showing that you can click this to open the document editor. If you prefer, you can still double-click anywhere on the row, or press Enter on the keyboard, as before.
New footer panel in worklist
We move the overview of how many invoices are in the worklist from the top to the bottom of the screen.
Before:
The number of invoices is under the module name at the top left of the screen.

After:

The number of invoices is in a new footer panel at the bottom of the screen. This footer panel will be expanded with more functionality in the future.